
Quick answer: PP corrugated divider cell size is the clear usable L × W × H inside each assembled cell—not the product size or slot spacing. For an accurate RFQ, provide the part’s maximum dimensions and orientation, cell layout, divider height, outer-box internal size, load, quantity and destination.
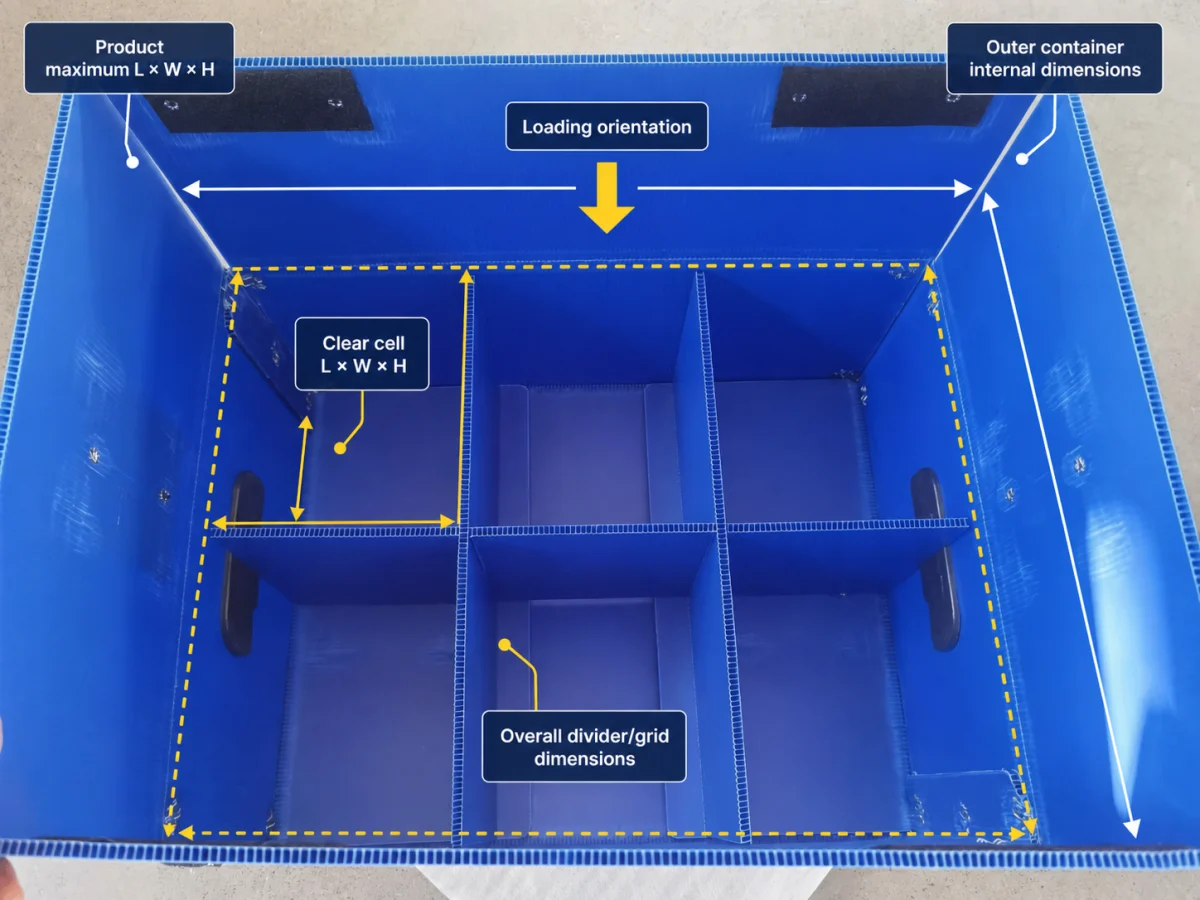
The labels show the five dimension groups to identify in an RFQ. They are concepts, not fixed measurements or clearance values.
“Cell size” can mean different things to a buyer and a divider manufacturer. A product may fit on paper but become difficult to load after the divider walls, intersections and outer container reduce usable space. The safest approach is to define the product, the clear cell and the complete divider grid separately.
This guide focuses on measuring clear cell size and preparing a useful RFQ. For broader information about structures and applications, see our PP corrugated divider racks and cell partitions overview.
Start with Three Different Dimension Systems
Do not put one unlabeled set of numbers on the drawing. Identify:
- Product maximum L × W × H: the largest envelope of the packed part in its intended loading orientation.
- Clear cell L × W × H: the usable opening after the divider grid is assembled.
- Overall divider/grid L × W × H: the outside dimensions of the complete insert.
If the grid sits inside a box, tote or rack, also provide that container’s internal dimensions. External dimensions do not show the usable space available to the divider.
Use one unit throughout the RFQ—millimetres or inches—and label it on every drawing and table. Also mark which physical direction each L, W and H refers to. A number set without units or orientation creates avoidable quotation errors.
Step 1: Fix the Loading Orientation
A part may fit in several directions, but each orientation changes the cell footprint, divider height and packing quantity. Mark which face sits at the bottom, which direction faces the operator and whether the part is inserted vertically, horizontally or at an angle.
For a regular part, maximum L × W × H may be sufficient. For an irregular part, send:
- photos from more than one angle;
- a marked drawing or CAD file;
- protrusions, connectors, sharp edges or sensitive surfaces;
- the maximum dimensions in the actual loading orientation;
- any bag, sleeve, cap or protective wrap used during packing.
Measure the packed condition. A cell designed around a bare part may be too tight after protective material is added.
Step 2: Define the Clear Usable Cell
State the target as clear internal L × W × usable H after assembly. Slot spacing or dimensions on flat divider strips are not automatically the same as the final opening because wall thickness, slot position and joint design occupy space.
There is no universal clearance percentage. The required allowance depends on:
- part tolerance and protective wrapping;
- manual or automated loading;
- insertion and removal angle;
- surface sensitivity;
- permitted movement during handling;
- finger access and operator speed;
- expected divider flex in use.
A close fit may limit movement but slow loading. A larger opening may improve access but allow more movement. Describe the required function instead of copying a standard gap from another project.
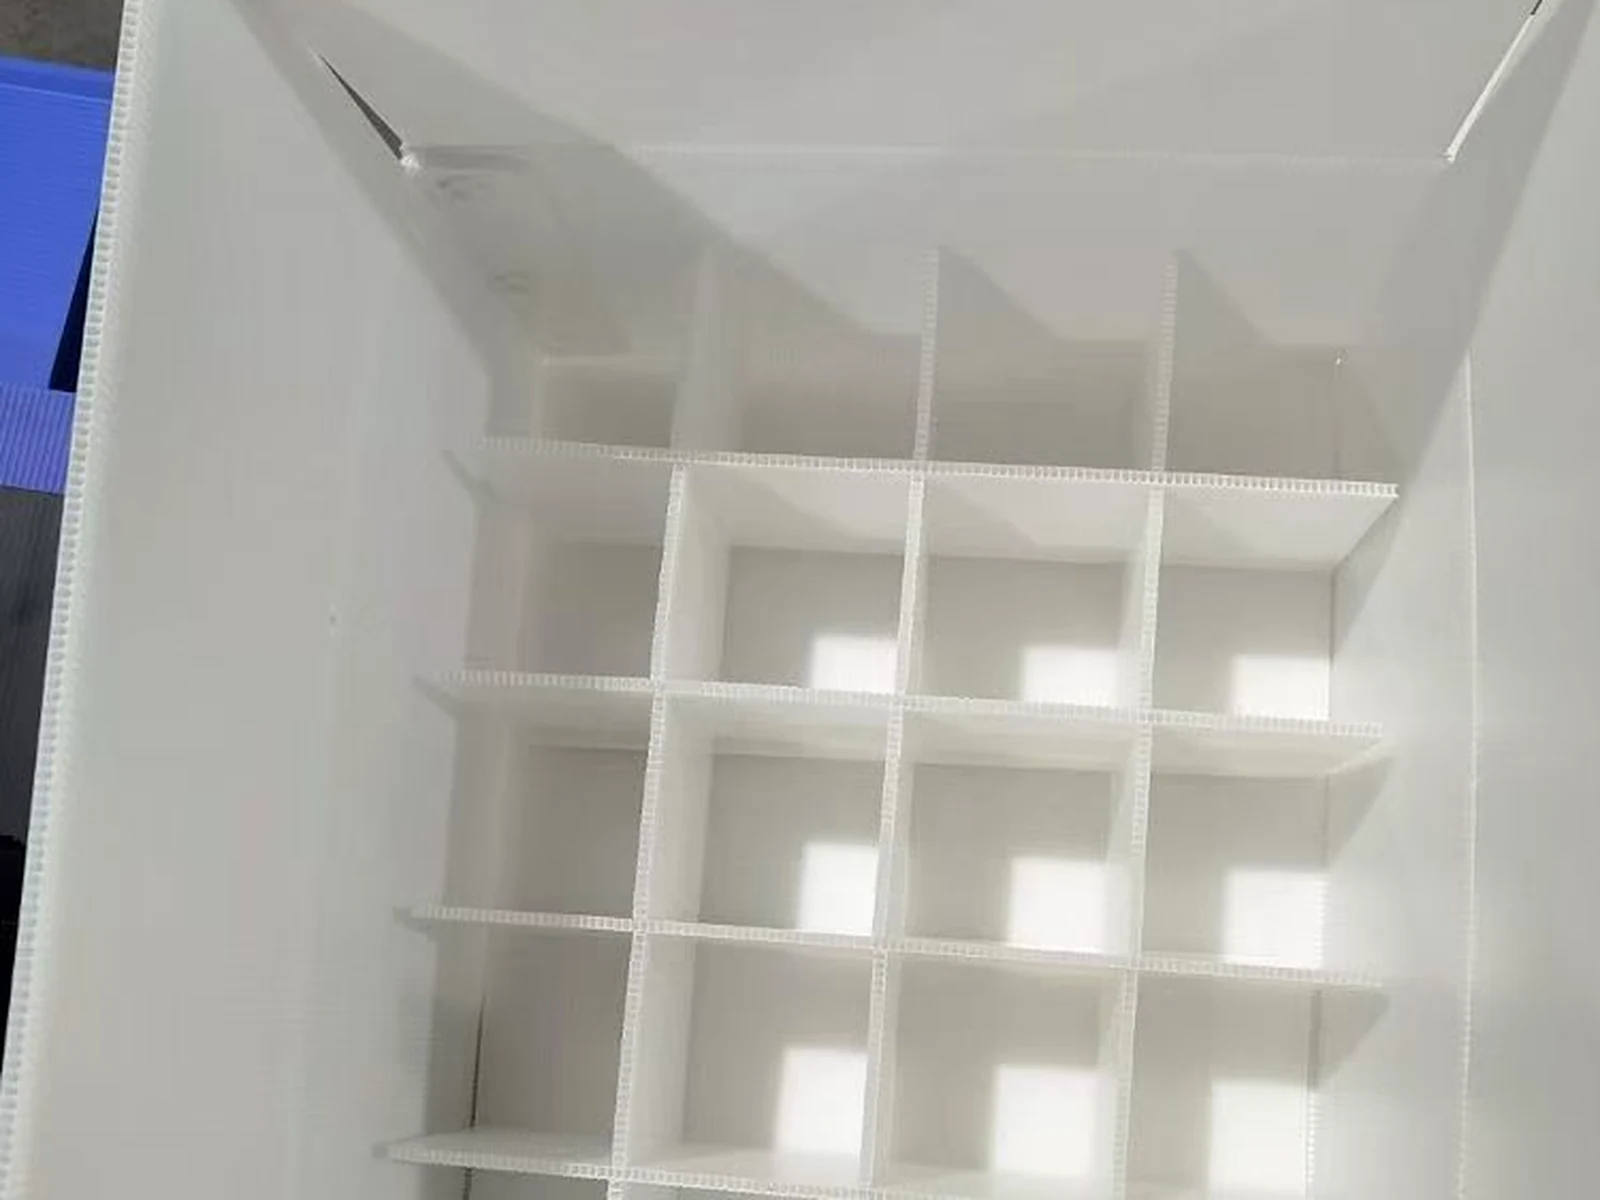
A real assembled divider view helps confirm usable openings, wall height and intersections before quotation.
Step 3: Mark Rows, Columns and Mixed Cells
“Twenty-four cells” is not a complete layout. It could mean 4 × 6, 3 × 8 or another arrangement with a different footprint.
Provide rows × columns, total cell count and the direction of the rows relative to the outer container. State whether the grid is fixed, removable or collapsible and whether any space is reserved for labels, tools or handling access.
Mixed-size cells can be reviewed, but every cell group should be marked on a layout with its clear dimensions, part orientation and quantity. Do not describe a mixed grid only by total cell count.
Step 4: Match the Grid to the Outer Container
Provide the internal length, width and usable height of the box, tote, pallet frame or rack. Mark anything that reduces usable space, including:
- handles and backing plates;
- corner fittings or reinforcement;
- folded seams and joined panels;
- lids, top frames or internal bases;
- pads, blocks or other inserts.
If Youqian Global is reviewing both the box and divider, send the required box size together with the part and handling information so both components can be checked as one system. Related examples are available on our custom PP corrugated boxes and dividers page.
Step 5: Confirm Height and Access Details
State the divider height and whether the part should sit below, level with or above the walls. Mark finger cutouts, edge treatments, label areas and any required assembly direction.
If flute direction is already fixed by an approved design, show it with arrows. If it is not fixed, describe the load and handling conditions and let the structure be reviewed. Our PP hollow sheet flute direction guide explains how to mark orientation clearly.
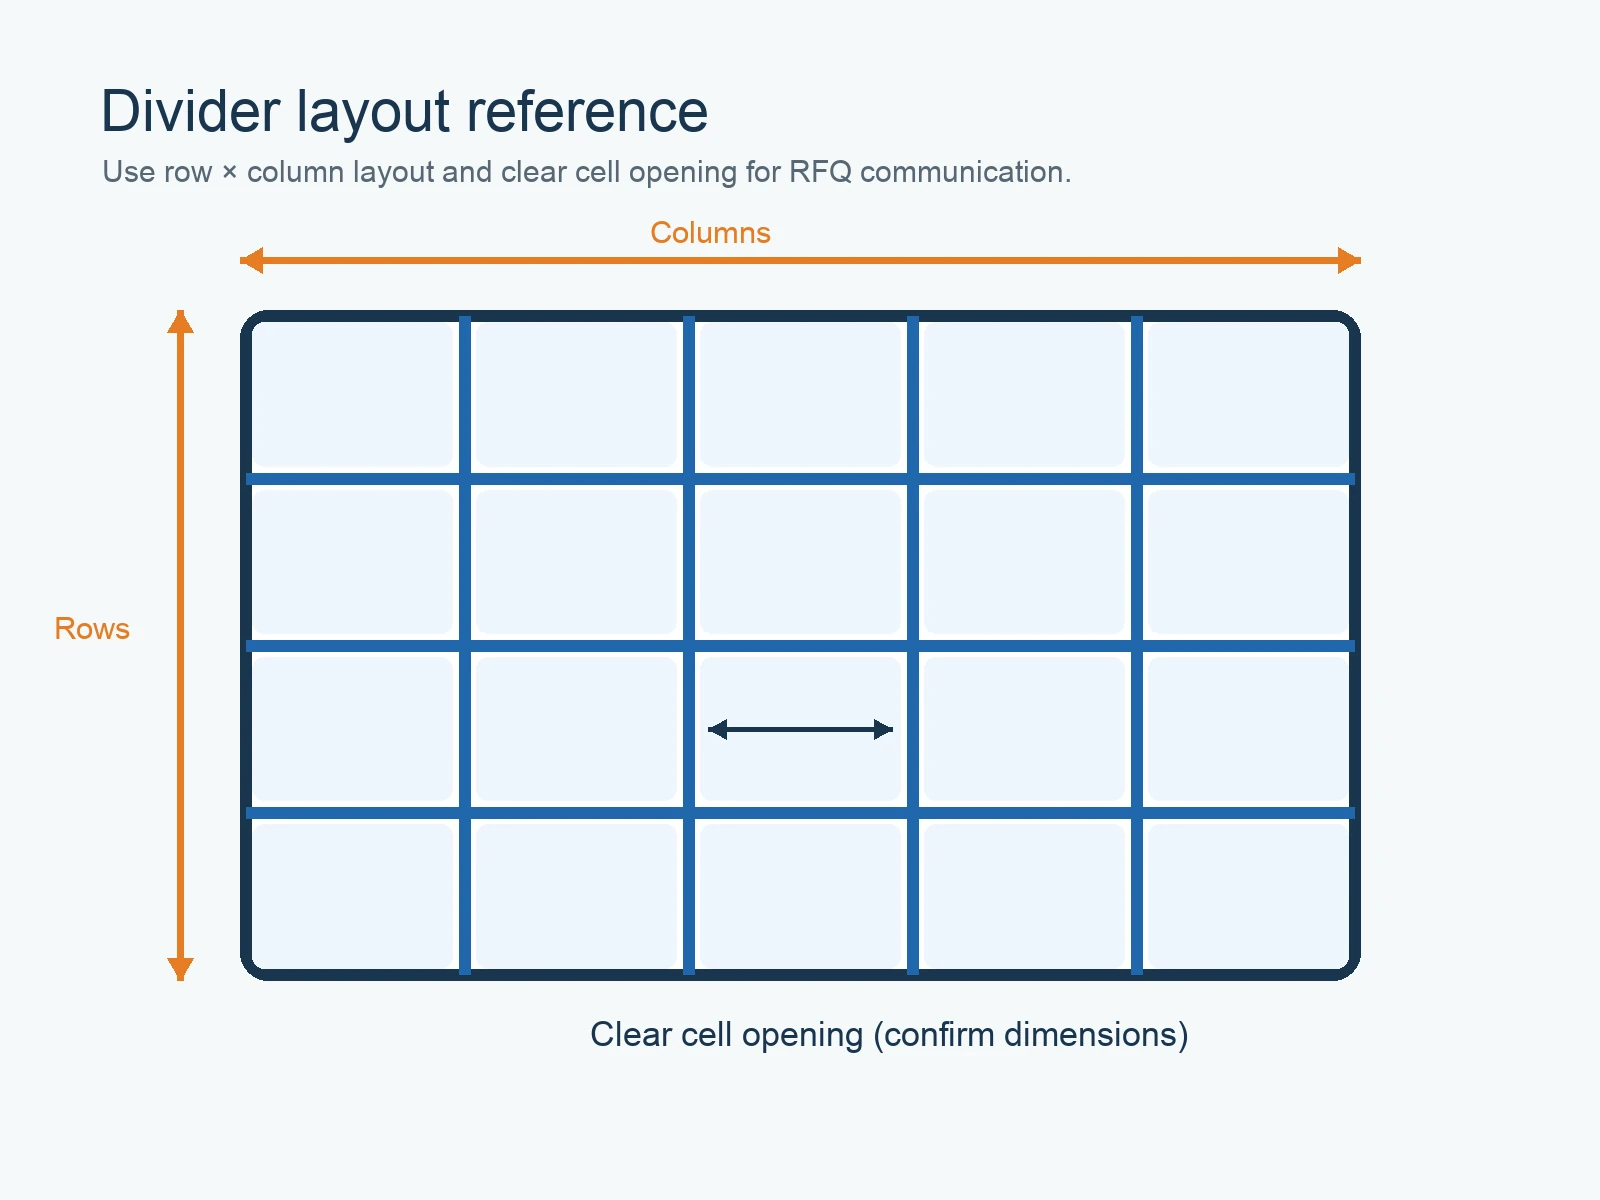
Use rows × columns and the overall layout to describe the divider arrangement; dimensions remain project-specific.
Step 6: Add Load and Handling Information
Dimensions alone are not enough for a structural review. Include weight per part, parts per container and expected total load. Also state whether the packaging will be carried manually, moved on a conveyor or trolley, handled by forklift, stacked, stored in-process or used for transport.
Mention surface-protection, cleanliness and movement requirements. These details support the review of sheet thickness, flute orientation, joints and reinforcement, but they do not replace physical validation for a new or close-fitting design.
Step 7: Validate before Production
For irregular, delicate, high-value or tolerance-sensitive parts, approve a dimensioned drawing and check a representative part or agreed sample before the production order. Test loading, removal and movement under the intended handling conditions.
Define acceptance criteria such as: the packed part can be inserted and removed without forced contact, the protective wrap stays in place and movement remains within the project’s allowed limit. Record any changes before mass production.
PP Corrugated Divider RFQ Checklist
| RFQ item | What to provide |
|---|---|
| Part | Maximum L × W × H, unit, loading orientation, weight, photos or drawing |
| Cell | Clear internal L × W × usable H; access or movement requirement |
| Layout | Rows × columns, total cells, equal or mixed cell groups |
| Divider | Overall L × W × H; fixed, removable or collapsible |
| Outer container | Internal dimensions and space-reducing hardware or inserts |
| Handling | Loading method, stacking and storage/transport route |
| Commercial | Quantity, destination country or port, packing and schedule |
Label unknown values as “to be confirmed.” Do not replace missing load, quantity or destination information with assumptions.
Frequently Asked Questions
What is PP corrugated divider cell size?
It is the clear usable L × W × H inside one cell after the divider grid is assembled. It is different from product dimensions, slot spacing and the outside size of the complete grid.
Should I provide product size or cell size?
Provide both when available. The part’s maximum dimensions and loading orientation show what must fit; the clear cell dimensions define the required usable opening. If the cell is not yet fixed, send the part and handling information for review.
How much clearance is needed?
There is no universal allowance. Clearance depends on tolerance, wrapping, loading method, surface sensitivity and permitted movement. Confirm critical fits with a drawing and representative part or sample.
Do I need the outer box internal dimensions?
Yes, when the divider sits inside a box or rack. Provide internal dimensions and identify handles, seams, reinforcement, bases or inserts that reduce usable space.
What information is needed for a quotation?
Send maximum part dimensions and orientation, weight per part, clear cell requirement, rows × columns, overall divider size, outer-container internal dimensions, handling conditions, quantity and destination. Photos and drawings help clarify irregular parts.
Send Your Divider Dimensions for Review
Send the part drawing or maximum L × W × H, loading orientation, required cells or rows × columns, outer-container internal dimensions, weight per part, quantity and destination country.